Showing posts with label baking. Show all posts

Wednesday, September 7, 2011

I'm a Georgia peach!

Really, I am. I heard this my entire life. I was born in Georgia, but never lived here until two years ago when my family moved here for my husband's job. I was born in Georgia, but I'm adopted and my adoptive parents did not live in Georgia. So, I only spent a couple of weeks and was whisked away! But for my entire childhood, family and family friends would remind me that I was a Georgia peach.

Here in Georgia, there are plenty of peaches to be found, especially at this time of year. Last summer, it took me a while to figure out where to get actual Georgia peaches. Most of the grocery stores sold peaches from other parts of the country(very strange, I know). But now that I am familiar with our farmer's market and a really cool produce stand that's open pretty regularly, I can get real, local, Georgia peaches for a pretty good deal!

This past week I picked up a small basket of peaches from that stand. Some of them were huge! It was amazing. And we did eat a few, but I soon found myself with four large, ripe peaches that needed to be used somehow or they were going to rot and then I'd feel guilty.

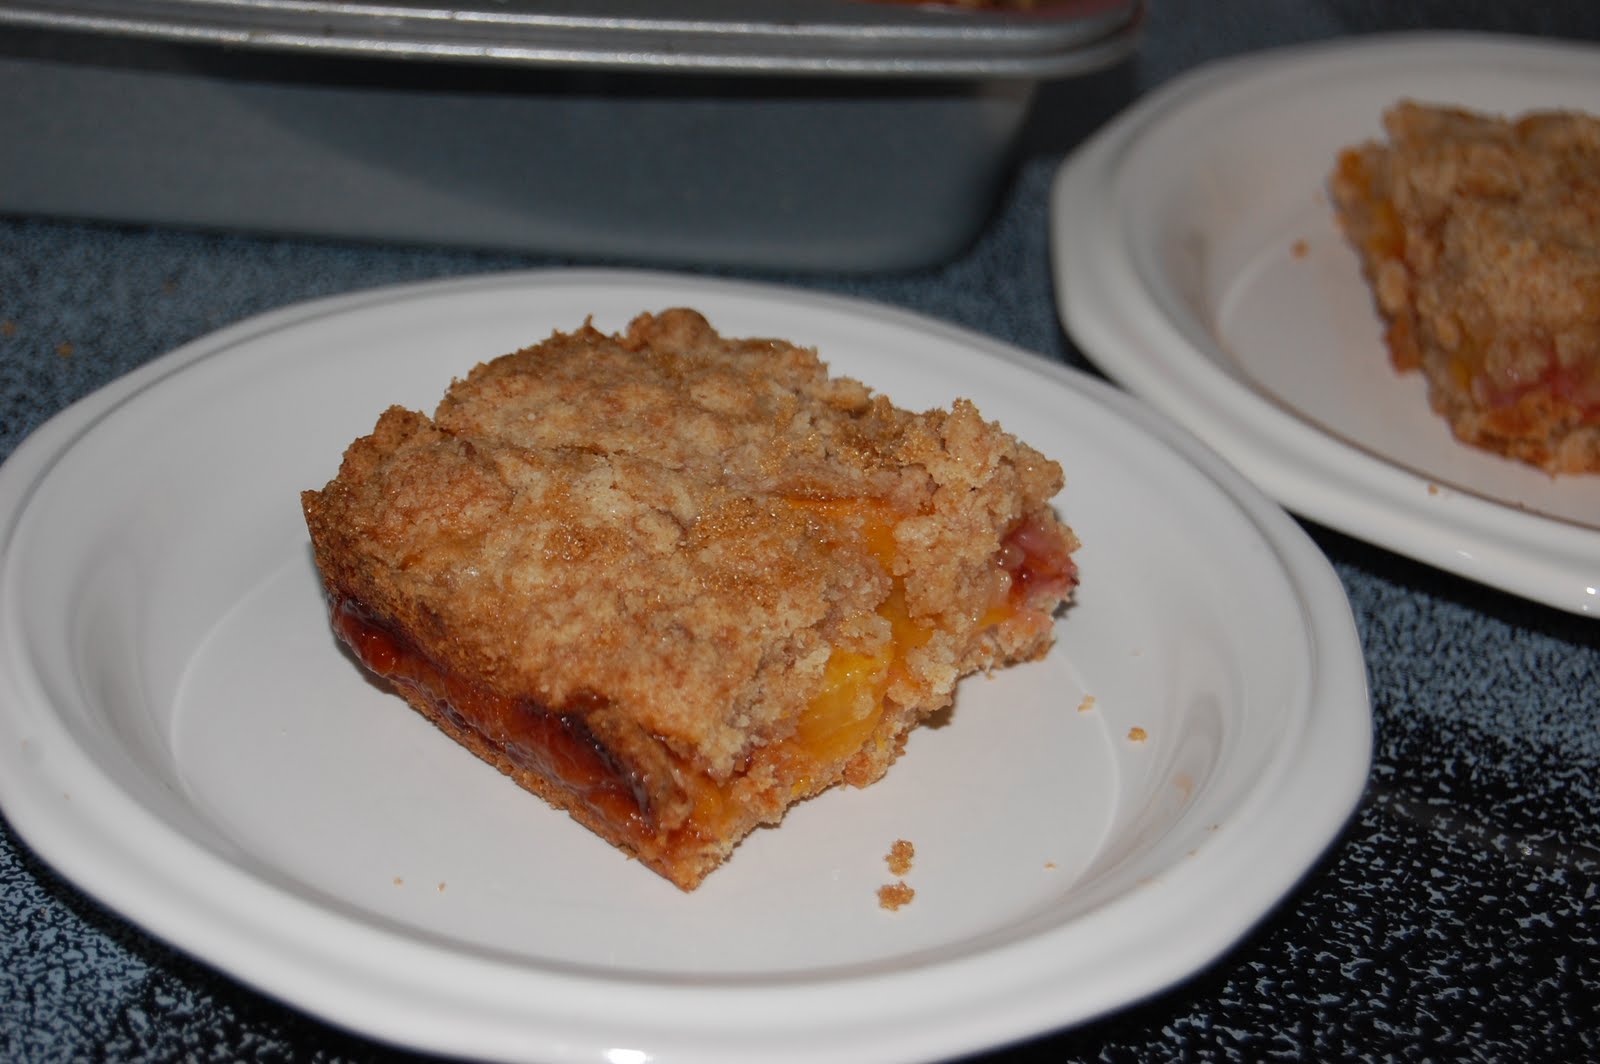
If you follow me on Pinterest, you may have seen me Pin a peach bar recipe the other day. I used that recipe and tweaked a couple of things. What I found, though, is that this is less of a "bar" and more of a "crumble." There is some firm texture to it, but unless you're eating this cold, out of the fridge, it's not that solid. It's very much like a cobbler, but not as wet. Therefore, it's a crumble.

This is apparently adapted way way back from an All Recipes recipe, so I'll notate that.

Peach Crumble

1 1/2 cups all-purpose flour
1 1/2 cups whole wheat flour
1 teaspoon baking powder
1 teaspoon ground ginger
1/4 teaspoon salt
1 tablespoon lemon juice
1 cup unsalted butter, chilled and cut into cubes
1 egg
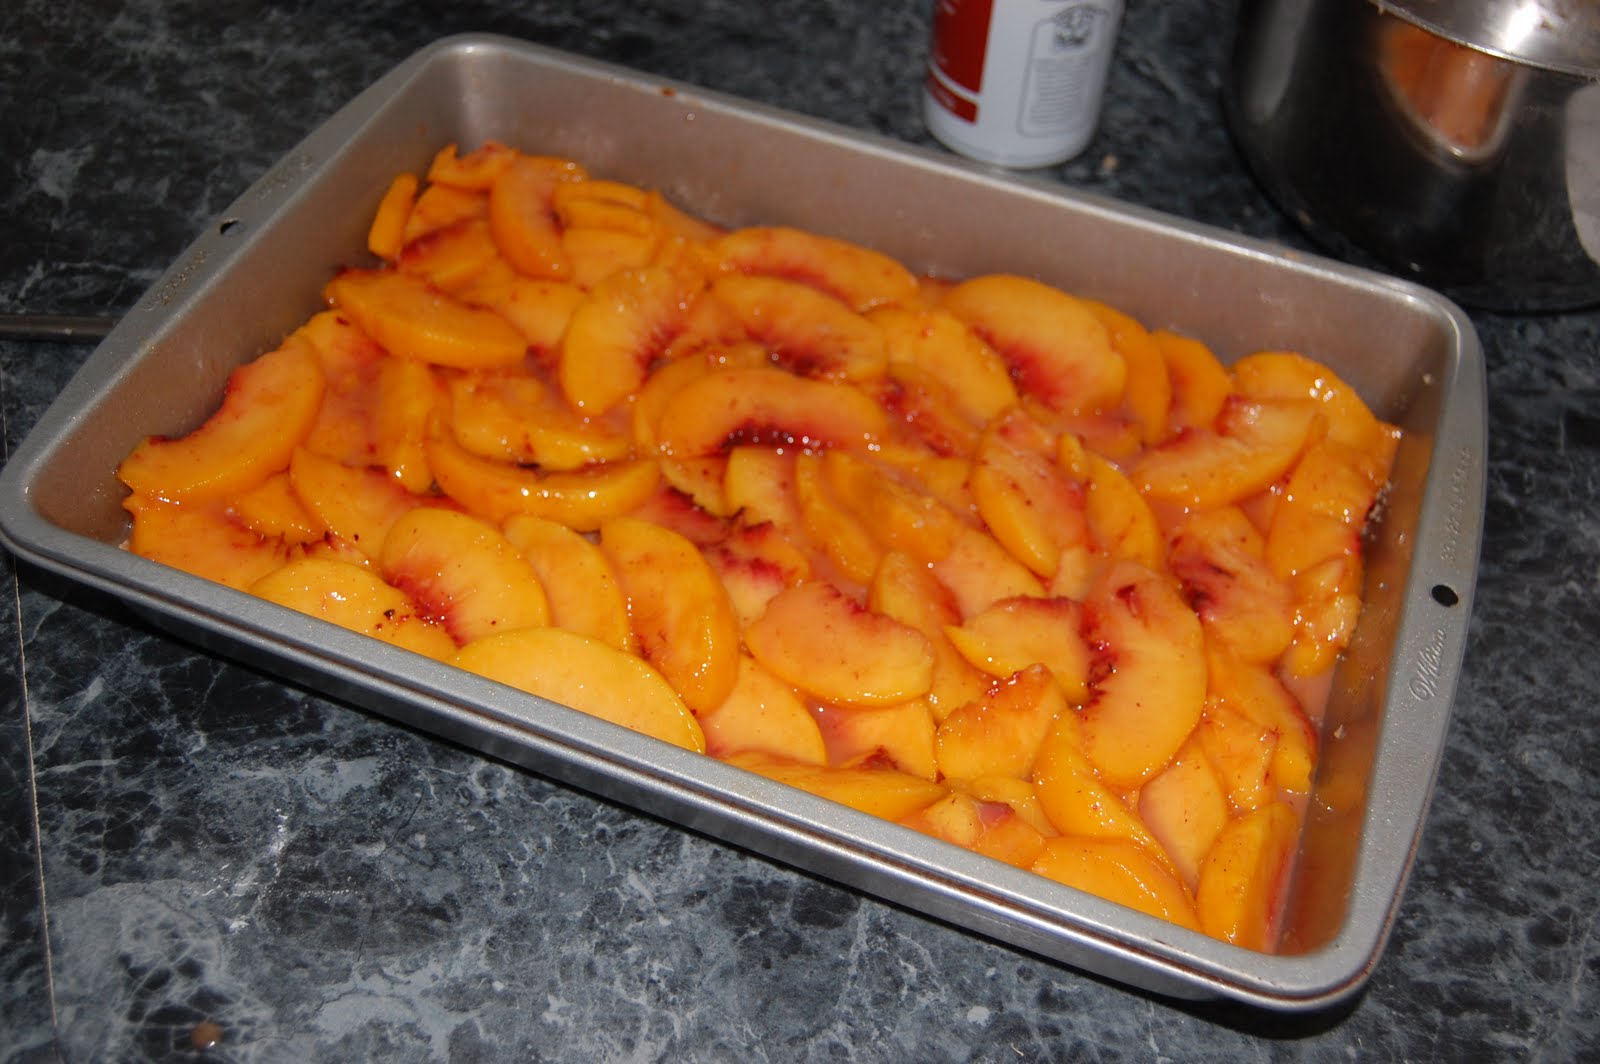
4 cups(about 4 large) peaches, peeled and sliced
4 teaspoons cornstarch

Preheat oven to 375 degrees. Grease a 9 x 13 inch pan.

Slice and peel the peaches if you didn't already.

Then, in a medium bowl, combine the flours, 1 cup of the sugar, baking powder, ginger, and salt. Add the lemon juice and butter and toss with the flour mixture. Use a fork to blend the butter until the size of peas. Whisk the egg and stir into the crumb mixture. Dough will be crumbly.

Press half the dough into the greased baking pan.

In another bowl, stir together the remaining 1/2 cup of sugar and cornstarch. Add the sliced peaches and gently mix.

Spoon the peaches over the crust.

Crumble the remaining dough over the peach mixture. I also gently pressed down to try and form more of a 'bar.' I don't know how much of a difference that actually made.

Bake for 45-55 minutes, until slightly brown. Cool before cutting. Store in the fridge.

I'm a fan. Though in the future I might stick with cobbler cause it's less work(and less mess) for pretty much the same result.
Friday, October 1, 2010

I made a muffin recipe!

I admit to having used a couple of generic muffin recipes as an idea for what I would need on a basic level. But from there, it was all me. Woot!

The picture is pathetic, because I am having camera issues. *le sigh*

Lemonberry Muffins by Nicole, yay!

2 cups all-purpose flour
2 cups whole-wheat flour
1 1/2-2 cups sugar(your choice)
2 Tbsp baking powder
1 tsp salt
2 cups buttermilk
1 cup canola oil(or other vegetable oil)
4 Tbsp lemon juice
1 package(I think it's 12-16oz. or so) frozen mixed berries, thawed

Combine dry ingredients in one bowl. Combine wet ingredients in another(except berries). Then add wet ingredients to dry ingredients, mix. Gently add berries to batter and mix.
Fill 24 muffin cups. Bake at 400 degrees for 20 minutes or until slightly browned.


Monday, September 27, 2010

Mmmm..... Waffles!

A few years ago, I wanted to buy some cookbooks. I really didn't have any, and still hardly do. So I picked up a few inexpensive ones at Home Goods. Of those, really only one has worked out. And it's this, Brunch: The Perfect Weekend Treat.

I've only tried a few things from it, mostly because brunches for us end up being something that can be made really quickly. As I place a higher priority on cooking from scratch and cooking really healthy, I think I'll spend more time with these recipes.

Yesterday I decided to try out Waffles with Caramelized Bananas. Oh boy. These are the BEST waffles ever! So, I will share the recipe with you. I want you to enjoy as well!

Makes 12 waffles to serve 4-6

Ingredients:
scant 1 1/4 cups all-purpose flour
2 tsp baking powder
1/2 tsp salt
2 tsp superfine sugar
2 eggs, separated
generous 1 cup milk
3oz butter, melted
Caramelized Bananas
3 1/2oz butter, cut into pieces
3 tbsp corn syrup(I used honey)
3 large ripe bananas, peeled and thickly sliced

Mix the flour, baking powder, salt, and sugar together in a bowl. Whisk the egg yolks, milk, and melted butter together with a fork, then stir this mixture into the dry ingredients to make a smooth batter.

Using an electric mixer or hand whisk, whisk the egg whites in a clean glass bowl until stiff peaks form. Fold into the batter mixture. Spoon 2 large tablespoons of the batter into a preheated waffle maker and cook according to the manufacturer's instructions.

To make the caramelized bananas, melt the butter with the corn syrup in a pan over low heat and stir until combined. Let simmer for a few minutes until the caramel thickens and darkens slightly. Add the bananas and mix gently to coat. Pour over the warm waffles and serve at once.

Wednesday, September 8, 2010

Meal plans for saving! (money AND my sanity)

Dinner is a drain. There, I said it. I get really tired of making dinner. It happens every gosh darn day! Sometimes I wish we could take a day off from dinner. But alas, the kids and the husband won't hear of it!

I used to be a non-planner when it came to meals. I would buy staple ingredients every week and freeze whatever meats were on sale that week, buy shelf stable items as I could afford to stock up, and buy way too many vegetables that would end up going bad before I used them.

It was wasteful, but at that point we were eating all conventionally grown items, so we could 'afford' the waste. Now that I've placed a priority on natural and organic items, the price tag is higher. In order to make up the difference, we had to eliminate waste.

And that's where meal planning comes in. Each week, I plan out the next week's dinners. Lunches are easy.... Leftovers go with the husband to work, Ansel and I eat leftovers if we have them or we eat something easy like sandwiches, and Kadin takes a sandwich to school each day. Breakfast is basic staple items.... oatmeal, cereal, eggs, bacon, etc. So those are just a regular part of my shopping.

This has definitely simplified my life. Because I know what I will be making for dinner, I find it easy to start dinner preparations earlier in the day, or overnight if necessary. There is no last minute panic about what to eat. I also don't wait too long to start, then realizing what I had decided on will take more time than I have available. I can also plan the more time consuming meals for the days of the week when I have more time to devote to them. It is really a load off my mind, AND, I find myself almost never wishing we could just order pizza or go out to eat.

I think I'll start posting my weekly meal plans, and then updating the blog most days about how things have turned out. Here's this week's plan:

Wednesday: Rotisserie chicken(the store-made kind, our natural foods grocery has them on sale), baked potatoes, and steamed broccoli.
Thursday: Pasta with bolognese sauce and salad.
Friday: Chicken mole, rice, and corn.
Saturday: Chicken rollers(a sale item at the store), ravioli(another store sale item), and salad.
Sunday: Burritos(this is a big batch make ahead item) and salad.
Monday: Red lentils, palak paneer, and rice.
Tuesday: Thai pasta salad.

I made bread last night, and will be keeping up with that this week. I also plan to make snickerdoodles for the boys and granola snacks for Ansel, as well as protein bars for the husband.

Off to the store we go! Let's hope I stay under budget again!

Saturday, April 10, 2010

Just another day in baker's paradise

I decided to branch out on my bread making. Since getting the Healthy Breads in Five Minutes a Day book, I'd only tried out one master recipe. So, I decided to give another one a go. This time, I tried the Hearty Whole Wheat Sandwich Loaf. This recipe contained the same primary ingredients as the Soft Whole Wheat, but with a higher wheat ratio and no honey.
Here's the dough rising. It looked a little sad, in my opinion.
And the finished product. I have to say, not wildly impressed. It was too hard on the outside. And the inside was too dense and too crumbly to be good for sandwiches. It was ok as toast, but I'm not going to bake bread specifically to use as toast.
I thought perhaps there had been some error in baking on my part, so when I used the second half of the dough, I skipped the steam portion, and cut the baking time. But same problem. Too hard, too crumbly. Iwon't make this dough again, at least not as sandwich bread. Maybe as garlic knots or some of the other suggestions for the dough. But we'll see. With so many available options, no point in spending too much time on one that doesn't work for me.

The same day as the bread I decided to make chocolate chip cookies. I LOVE chocolate chip cookies. But, I know they're not all that good for you(although also not all that bad if you know what you're putting in them).
As I've mentioned before, we don't use any Nestle products, or any products owned by Nestle(like Gerber, betcha didn't know that one!). But there is something to be said for the Nestle Toll House Chocolate Chip Cookie Recipe. And I have no problem using the recipe so long as I'm not using any of their products. Upon suggestion of another site, I decided to modify the recipe and use half the amount of butter it called for. And, as usual, I skipped the nuts.
Very nice looking cookies! And guess what?! They tasted really good, too!
Now that I've tried with half the butter, I don't intend to go back. The taste was not affected negatively. The cookies were able to bake without overly browning. The other blog(if I remember it, I'll post the link), also suggested using half wheat flour, so I'll try that the next time. Can't hurt!

I like big buns!

I'm baaaack!!!! I feel like I've done more 'I'm back' blogs than I have anything else. I got derailed by hectic life events, a trip to Disneyworld, and a wicked stomach virus that attacked the smallest member of the household. The next couple of items are actually from before chaos ensued, but I never got a chance to blog about things. So I'll try and get a couple of quick entries up and then resume with things as they're actually happening.


Hamburger buns! This is another item from Healthy Bread in Five Minutes a Day. The book raves about this recipe, and I was definitely skeptical. I'm not a huge fan of wheat buns. They seem to be distracting to me.... just too much going on. But, as a part of this all whole foods thing, I figured I'd give it a go.

They looked soooo good coming out of the oven! And they smelled amazing!

We grilled hamburgers outside, of course, which meant the boys got time to play outside. We have a dirt/rock pile off to the side of the house(no idea what it's from, it's just always been there) and they spent a good deal of time just digging.

I'm trying to get used to my new lens. This was fun for me to be able to stand on the patio and take pictures of the kids on the far side of the yard. Still needs work, but it was exciting!

And the husband doing his part. I do grill as well, but if he's available to do it, I am HAPPY to share the responsibility.

The buns got rave reviews! They used the same dough as the Soft Whole Wheat Sandwich Bread I've been making as our basic bread. It was remarkably simple, and there was no specific skill or technique necessary to get a good result. The book also gives instructions to make hot dog buns, which is very similar to making the hamburger buns. I don't think I'll be buying buns again! The taste was flavorful, but not overpowering, much better than any storebought wheat buns I've had.

Saturday, March 13, 2010

It's carbolicious!

Bread day! I don't really intend to make copious amounts of bread in one day again, but that's how it all happened and to be honest, it really wasn't that bad..... I made three loaves of bread, all different, yesterday. Wow! And two were 'real' bread.

I started out by making another loaf of the white bread I posted about last time. This time I made it for my neighbor, who is scared of using yeast. I've told her it won't bite her, but she doesn't believe me.

As that dough was rising, I started my next dough.

I purchased this cookbook, Healthy Bread in Five Minutes a Day a couple of weeks ago and have been slowly gearing up to start following their plan. There's a pretty lengthy chapter in the beginning about ingredients and materials and supplies, and yes, I actually do read things like that.


The basic idea is that they have master dough recipes that you make and store in the fridge until you're ready to bake. The dough will stay in the fridge for up to five days. As you need to, you pull off a certain amount of dough, manipulate it slightly into what type of bread you want to make specifically, let it rise, then bake. No kneading! (in almost all cases) And it only takes five minutes when you actually use the dough. Making the master recipe does take a bit of time, but really not even all that much.

Now, if I can manage to just set up my routine to do this, we'll be golden. You can make anything. There's different variations to the master recipe in this book. Some use all whole wheat, some a combo of wheats, some use various other grains as well. The one I decided to start with was the Soft Whole Wheat Sandwich Bread. It makes four pounds of dough, which makes two loaves of sandwich bread. We mostly use bread as sandwiches and toast, so this is perfect for us. It also shows an easy way to make hamburger or hot dog buns using the same dough, so that's great.

I'm not going to post the recipe, because these aren't available online. There are some on their website which I linked above, and a lot of libraries also have their cookbooks.

This is what went into the master recipe.


Here's the dough, all mixed up, before it rose.

This is the part of the dough I used(half of the total) to make one sandwich loaf last night. You simply cut off the amount you need, flour the outside a little, shape it into whatever you're making, then put it in/on the pan to rise.

And the finished product! I am seriously amazed every time something comes out looking the way it should. I expect failure, and am totally impressed with every success.
I am happy to report that today the boys and I had sandwiches for lunch using this bread, and it's GREAT! Tastes like fancy bakery shop bread. So exciting! I used to spend $5+ for something like this up in Virginia without batting an eyelash.


After mixing up the master recipe dough yesterday, and after baking the neighbor's bread, I got started on banana bread. My whole family likes banana bread, and I like not wasting things(like overripe bananas). It also makes for quick snacks or breakfast, so that comes in handy.

The recipe I usually follow is pretty simple. I don't put nuts in mine because the kids tend not to like nuts in things. I was the same way, so it doesn't bother me to accomodate this one.

Banana Banana Bread

One of the tips I picked up somewhere along the way, which is useful and I actually used this time, is if you're short on banana per the recipe, fill in the difference with applesauce. I was short about 1/3 cup of mashed banana, so I used one individual serving size of applesauce. You can't taste the applesauce, but it continues with the appropriate moisture and texture, so it works very well.

And the finished product! Making banana bread is super simple, so I didn't bother with step-by-step pictures. You just mix stuff together, pour in a pan, and bake it!

Thursday, March 11, 2010

Rising to the occasion

And I'm back! I took a couple of days off from the blog(but not from cooking and baking) for my birthday, which was Monday. But yesterday, I was right back on to baking and taking pictures and posting! Glad to be back, but a break is nice, too!

In trying to stay with my once a week grocery shopping plan, I make a concerted effort to not run to the store for "just one thing." When does it ever end up being only one thing? And what a waste of gas and time anyway to go out just for that one thing. So we were out of bread, but I send a sandwich to school with Kadin every day for his lunch. Not having bread is a bit of a problem!

Now, realize, I've never MADE bread before. I've made banana bread or pumpkin bread, but not just bread. And I did try a cranberry swirl loaf real bread back in January, but I killed the yeast in the first step, so it was really dense and didn't rise right or anything. It tasted good, but the texture was alll wrong.

I just knew that if this whole foods thing was going to work, I was going to have to conquer bread. So I bought a bread book, and I'm working on figuring out how to implement it, but I was missing a significant ingredient for it's main recipe. So Google saved the day! It took a long time because a lot of things called for stuff I didn't have(like skim milk) or made two loaves(I only need one at a time and only have one loaf pan anyway). So I found one that used things I had, and sounded manageable.

Super Easy Bread for Beginners


I would have included pictures of the ingredients and the beginning of the process, but, I was on the phone with my mom at the time and to be honest, it just didn't even occur to me. But here's the dough, all mixed up. This is the point at which the dough was "chasing" the spoon around the bowl. I liked that description!

This is the dough in the buttered bowl, next to the heated oven(I was about to start granola bars) so it can rise. Sorry for the monotone here, didn't even occur to me to use a colored bowl. But ceramic Pfaltgraff does conduct heat well, so maybe it was actually a good idea.
Here's the dough an hour later, about to be punched down and kneaded. I was so ecstatic to see it had actually risen in a way that looked right to me! Yay!

And the finished product right out of the oven. When it came out, it was really hard, and I was a little bit scared. But after an hour or so, the top started to soften, so I was really thrilled. I wanted to make sure it turned out right, so as much as I wanted to test it, I didn't slice any off until this morning.

And..... this morning, I had to make Kadin's sandwich as usual. I sliced the heel off and, whaddya know, it was soft bread! And the crust was chewy, not hard like I'd feared. And it tastes.... good! I will definitely make this again sometime, but I will bake it a little less and see if that makes the crust even better.

My other project yesterday was granola bars. This is what I made while the dough was rising.
I wanted to try a new recipe. But I sort of had a heck of a time finding one to try. So many call for things like Rice Krispies, which is exactly the sort of stuff I'm trying to avoid feeding my kids(and myself). So finally I found this one, and I thought I had all the stuff for it, so why not. As it would turn out, I didn't have the peanut butter chips. I forgot I had used them in cookies that Fawad took to work. So instead I used all chocolate chips, which was really fine with me anyway.

Peanut Butter Granola Bars


Again, I know some of this stuff isn't ideal. I'm still using up that peanut butter(this is the last jar). And when I'm baking, I use regular honey, not local.
The dry ingredient and the wet ingredients. I love when things look good along the way.
All mixed together. I taste a little, really good!
All done, out of the oven! It said to bake just until the edges were browned, and that's exactly what I did.

The recipe says it makes three dozen. I can't imagine how small they would have to be to make that many out of one pan. I cut it into 18 bars which were a more normal granola bar size.
Now, I'm not sure if I'd make this one again. They taste good. But they're really crumbly. I think it's because they're so thin, and it just doesn't hold together. Maybe it would be better in a smaller pan, but I'm not sure if that would be enough to take care of the problem.


And this is what I made for the boys in the middle of all of this. The husband I were having leftovers from the night before's dinner out, so I didn't want to exert a lot of effort just cooking for the boys. So, half a box of whole wheat organic spaghetti, about a third of a jar of organic marinara sauce, some parmesan cheese, and a quick spinach salad. Voila! Dinner!

Thursday, March 4, 2010

Tea cookies and muscle fuel

I'm getting back on the baking bandwagon. I didn't get anything done while I wasn't feeling well, so it was a good thing we had enough on hand to get through without taking too desperate of measures.

This week I wanted to make a non-chocolate cookie as I have it in my plans to make peanut butter and chocolate granola bars(probably tomorrow). So I did some internet browsing and came up with a recipe for Swedish Butter Cookies from Taste of Home. Now, I have no idea if there is anything remotely Swedish about these, but that's what they call it.

The nice thing about this recipe is it calls for only very basic ingredients that you're likely to have on hand all the time.

Swedish Butter Cookies Recipe

I started with the ingredients. As I said, very basic. Do notice that I'm still using white sugar and regular white flour. I'm working on using up my more 'conventional' ingredients. I don't want to just throw things out, but I won't be rebuying things like this if I can help it.

He loves to mix. I would almost say that Ansel lives to mix! We did eventually have a melt down when the dough got to the point that he couldn't mix it.

The dough. It was sort of dry, but I packed it down and it got sticky enough.

Dough rolled out. It was sort of like rolling playdough, but not as forgiving. This would be fun for an older child(Kadin would have been ok with, but no way Ansel could have gotten it to stick together).

The cookies baked, cooling, and sugared. I would have taken a picture when it came out of the oven, but one of the tips I read said to cut the cookies immediately, so I made sure to do that.

They're basically crispy, buttery sugar cookies. I think they're good, but I don't know that I'd remake them. Not when there's so many other cookie options. I like that they're small, so I don't feel bad letting Ansel eat one or two here or there.

My husband has a thing for protein bars. His favorite has actually been more of a nutrition bar, namely the Zone Perfect Strawberry Yogurt Bar. I'm now left to wonder.... has he read the ingredients on that? There's actually a couple of things in there that are rather alarming. So, of course, I wanted to make this myself. I think the idea originally occured when I was watching Alton Brown. So, of course, I tried his recipe first.
This is a lot of stuff. I had to go out of my way to buy a couple of things to make this, like oat bran(which I never would have thought to buy) and soy protein powder. And yes, that IS plain old Skippy peanut butter. As I mentioned up above in reference to the cookies... I'm using up some things I have already. I got a heck of a deal on Skippy peanut butter a while back and stocked up. I used the end of this jar making the protein bars, and then I have one more jar. After that, I'll be buying fresh peanut butter from the store I buy most of our food from.
The other interesting thing that happened is that we discovered Ansel likes to eat plain, cold tofu. Who knew?
There was a lot of mixing. Ansel got to help a lot. And I could have taken pictures, but.... the majority of time, it all looked like vomit. And... it was terribly unappetizing. You never would want to try any of this. I even thought about giving up at some point. So here's the dough right before I spread it in the pan. Oh! And here's a picture of the unfiltered apple juice I used. I forgot it in the ingredient shot.

These looked pretty good coming out. That's all fruit, not chocolate, by the way.

And cut and wrapped up. I actually cut it into sixteen servings. I froze some of them since there's no way my husband will eat sixteen in a week. And I'd really rather my kids not get too used to meal replacement items. They have the time to eat "real" food, and I'm the one who has to prepare it for them anyway. So why the heck not?

And that's it for that! I did actually manage to also make dinner on this day. We had steak, baked potatoes, and salad. Very imaginative, don't you think?

Wednesday, February 24, 2010

Getting started with snacks

Ordinarily Monday is my grocery shopping day. But this past Monday was a very rainy day, and there wasn't anything I was in dire need of, so, I decided to bake instead. First items.... granola bars and cookies.

Ansel has a real 'thing' for granola bars. He requests "bars" with a strong Jersey-like accent which is tremendously endearing and makes it very hard to say no. If you DO say no, his new go-to line is, "But I'm SO hungry," and shoots you this sad, puppy dog look and you just can't say no. So the least I could do was make a healthy, affordable bar option for him. And heck, for the rest of us! I saw Alton Brown make granola bars on his show once, and ever since then I've had it in the back of my head to try his recipe. So that's what I did.

Alton Brown's Granola Bar Recipe


Now, one must always(in my opinion) start with a tidy kitchen. My smallest helper was happy to pitch in.

All of the dry ingredients have to be toasted. This was great because Ansel was able to help with all of it, and he had a blast spreading it on the cookie sheet. This is oats, raw sunflower seeds, wheat germ, and almonds. The recipe called for sliced, but we had slivered. Close enough!
I should have taken a picture of this sooner, but you mix the sugars and wet ingredients and combine on the stove. It only took a minute or two and smelled really good! I used a berry mix for fruit. I think it would be easy to sub in chocolate chips, but things might get a little gooey.

Everything gets spread into a pan(recipe called for 9x9 but I had 8x8) and baked.

And while things bake, you start to clean up!

Finished product! Basically, you let the granola cool after you pull it out of the oven. It took several hours to no longer be warm. Then cut into bars. This made a dozen generous sized bars for us.

I was still feeling like baking, and since the kitchen was already a bit messy, we decided to launch straight into cookies. Oatmeal chocolate chip was our first undertaking. I have a fair bit of cookie making experience. Oatmeal has always been a favorite, and I try to justify that it's almost, sort of, a little bit like eating oatmal. Somewhere deep down, right? But we also have a lot of oats we've had a while that I want to use so I don't have to worry about them going bad. I followed the basic Quaker oatmeal recipe.

Quaker Vanishing Oatmeal Raisin Cookies

Mmmm.... butter! I love butter, and I am not afraid of it. I don't go out of my way to consume it in huge quantities, but I don't avoid it. I never use margarine. And I almost always use salted butter, unless a recipe specifically calls for unsalted butter.


Cookie dough well on its way. I used a full cup of milk chocolate chips. Note: I use Hershey's chocolate chips, not Nestle. I do not use any Nestle products of any kind(unless I slip up and don't realize that a product is owned by Nestle. I'll get into that eventually.).

I have a thing for parchment paper. It's not 'green' and I know that. But.... it makes everything come out better. And sometimes it saves my food from being burned or sticking, so it reduces food waste? Maybe? But you'll notice lots of parchment paper. (Also see granola cooling to the right).

Cookies in the oven. I don't know if baking on two tiers like this is exactly correct, but I do it because I'm impatient.

My dogs were not happy that they were being terribly neglected while I baked and baked and baked. Their crates are in the area that should be a breakfast room, except it's much too small to be a breakfast room, and putting a table in the place it should go(under the light) would obstruct traffic from getting out the back door or into the master bedroom. Can you say poor planning?
This is Ellie, our husky mix, shooting me pathetic looks.

And Teddy, our mastiff/St. Bernard mix puppy was so perturbed he couldn't even bother himself to move when I got down in his face with the camera.

He is ever so excited about the finished product. I mean, seriously, he is THRILLED!

And this is how much one batch is. I would, generally, give each kid two cookies at a time for a snack or dessert. And this would last us a week. Except, I ended up sending some with the husband to work for something they were doing there, so I may be making cookies again over the weekend. Only time will tell!

I store cookies in a glass cookie jar on the counter, back out of easy reach of small hands. If I bake up a batch and it's just a ridiculous amount, I freeze some in freezer Ziploc bags. Most cookies freeze and thaw very well.